Getting Started with Codewind in CodeReady Workspaces
Use CodeReady Workspaces to develop cloud-native applications from an OpenShift cluster.
Objectives
- Install CodeReady Workspaces and Codewind.
- Create a Codewind workspace within CodeReady Workspaces.
Overview
Use Eclipse Codewind to develop microservice applications from application stacks in an integrated developer environment (IDE). CodeReady Workspaces provides a containerized IDE for cloud-native application development on an OpenShift cluster.
Developing with CodeReady Workspaces
CodeReady Workspaces uses Kubernetes and containers to provide a preconfigured environment. Use CodeReady Workspaces to create, build, and test your code in OpenShift containers but feel like you are working on an IDE on your local machine.
Prerequisite
Before you can use Codewind with CodeReady Workspaces, you must have an OpenShift cluster available. To install OpenShift clusters, see CodeReady Containers.
CodeReady Workspaces require at least two 5Gi ReadWriteOnce (RWO) persistent volumes on the cluster to install and a 5Gi RWO volume for each created workspace.
Each Codewind workspace also requires at least one 5Gi ReadWriteMany (RWX) persistent volume.
Installing CodeReady Workspaces
1. Log in to your OpenShift cluster’s dashboard.
2. From the sidebar, click Operators then OperatorHub.
3. Search for CodeReady Workspaces.
4. Select Red Hat CodeReady Workspaces:
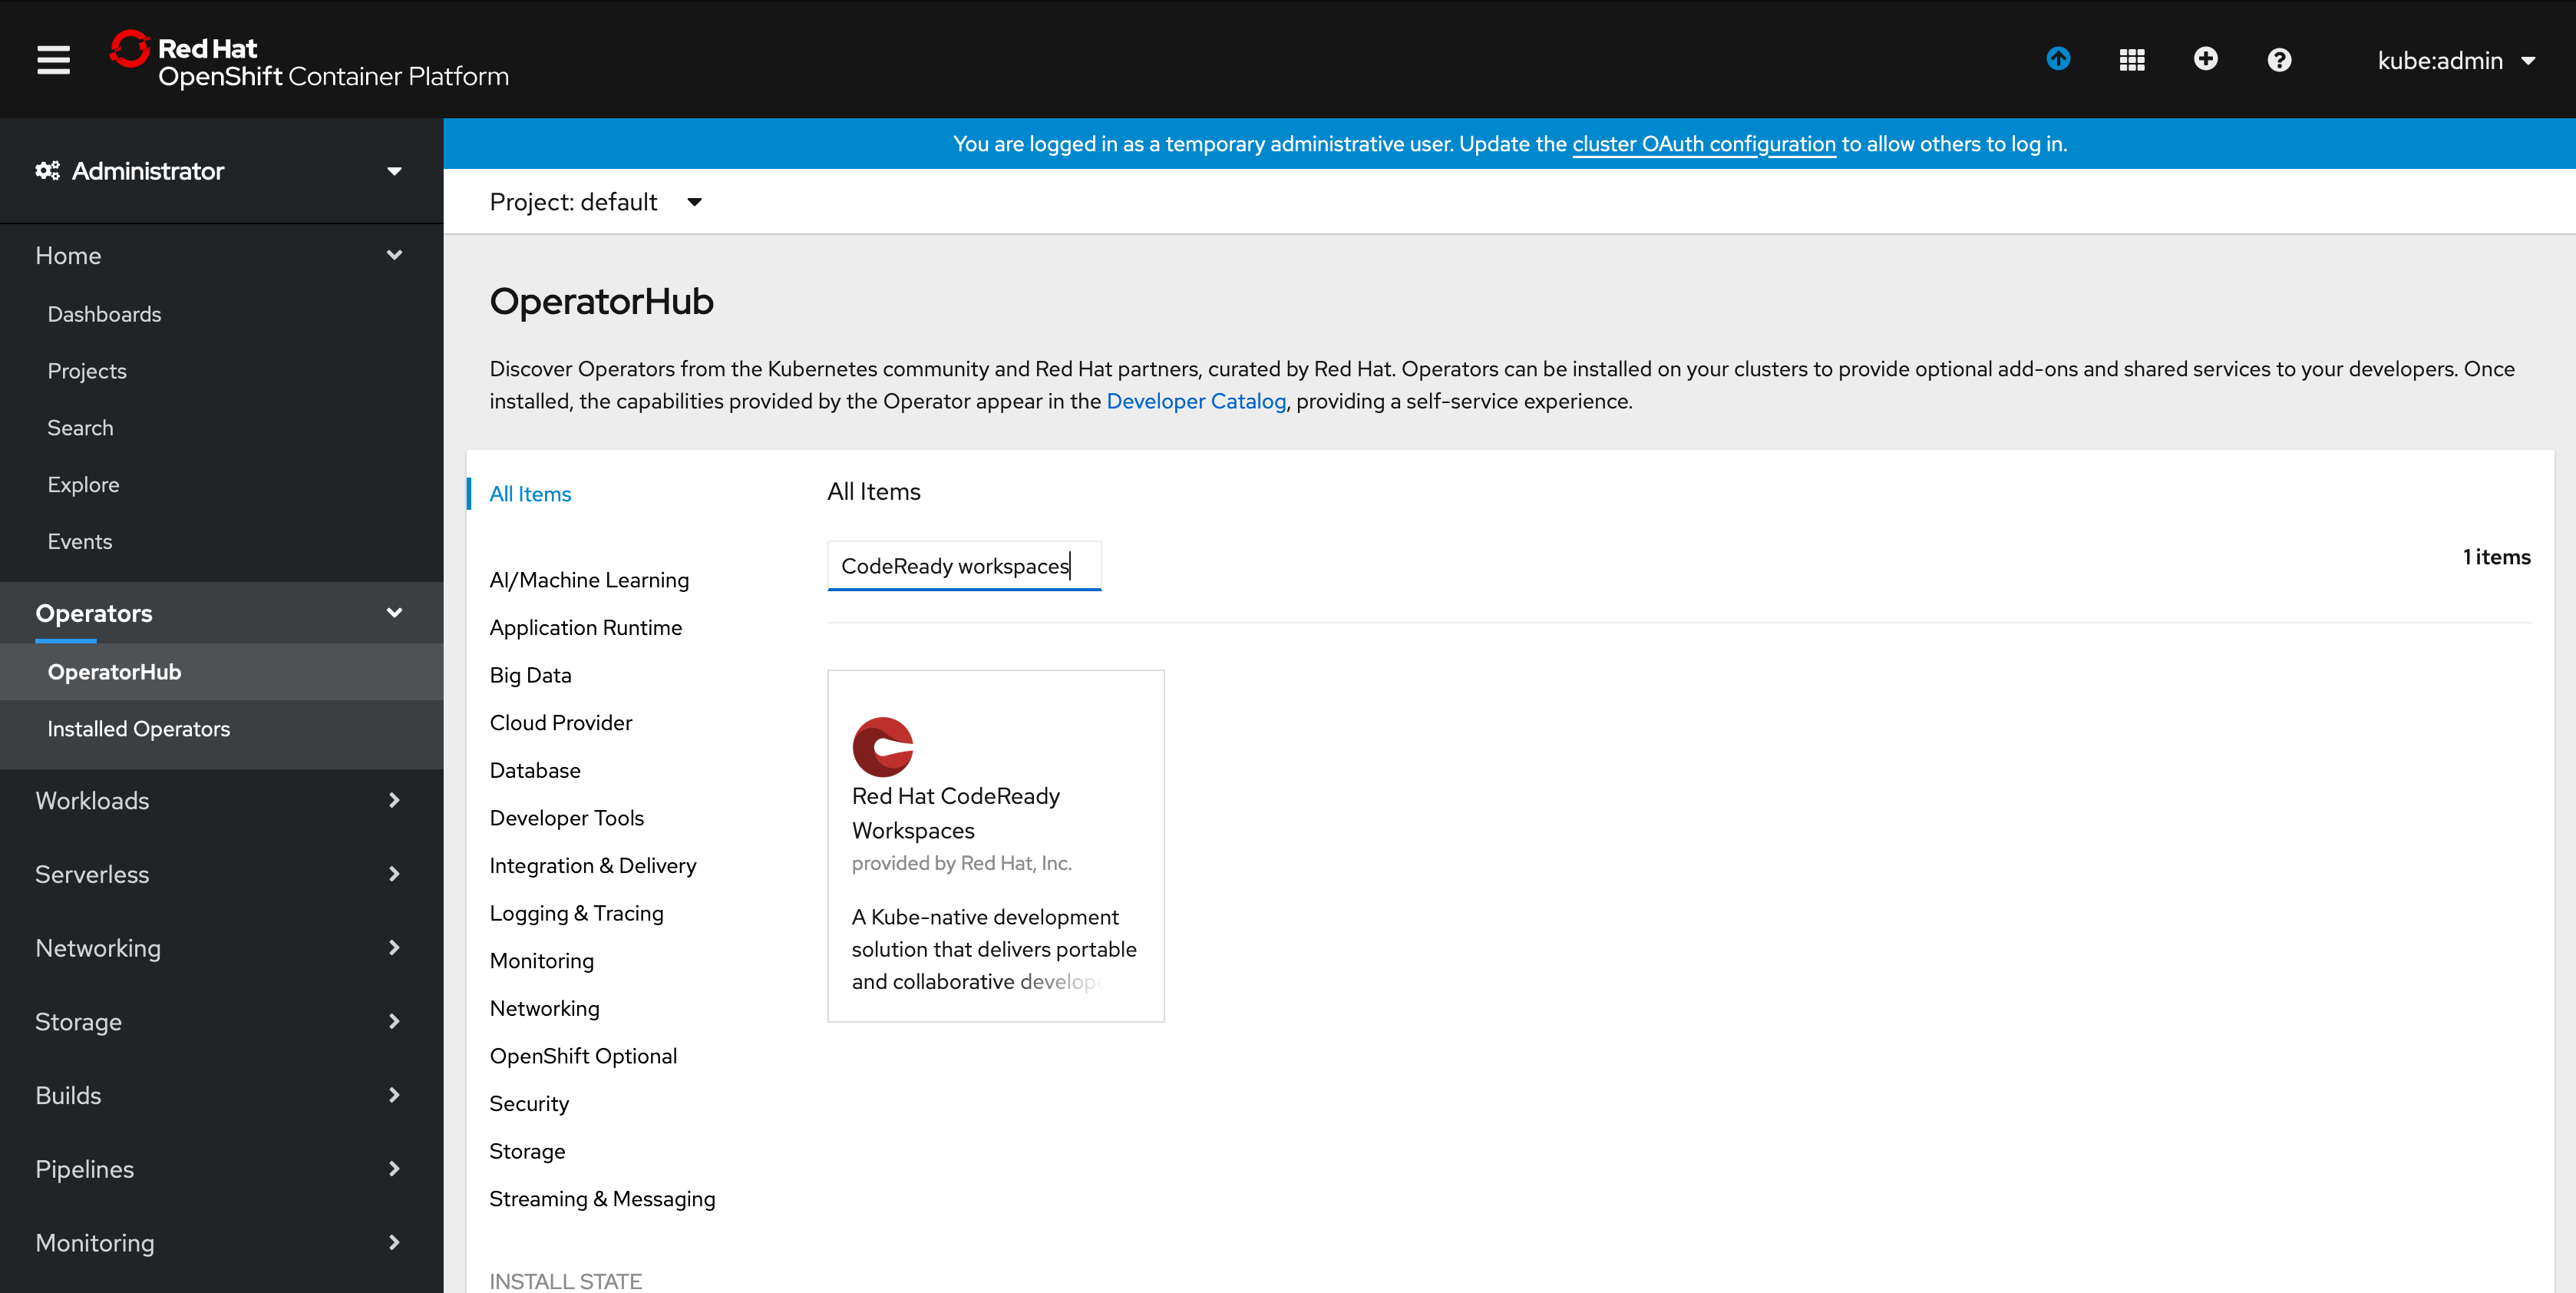 .
.
5. Click Install:
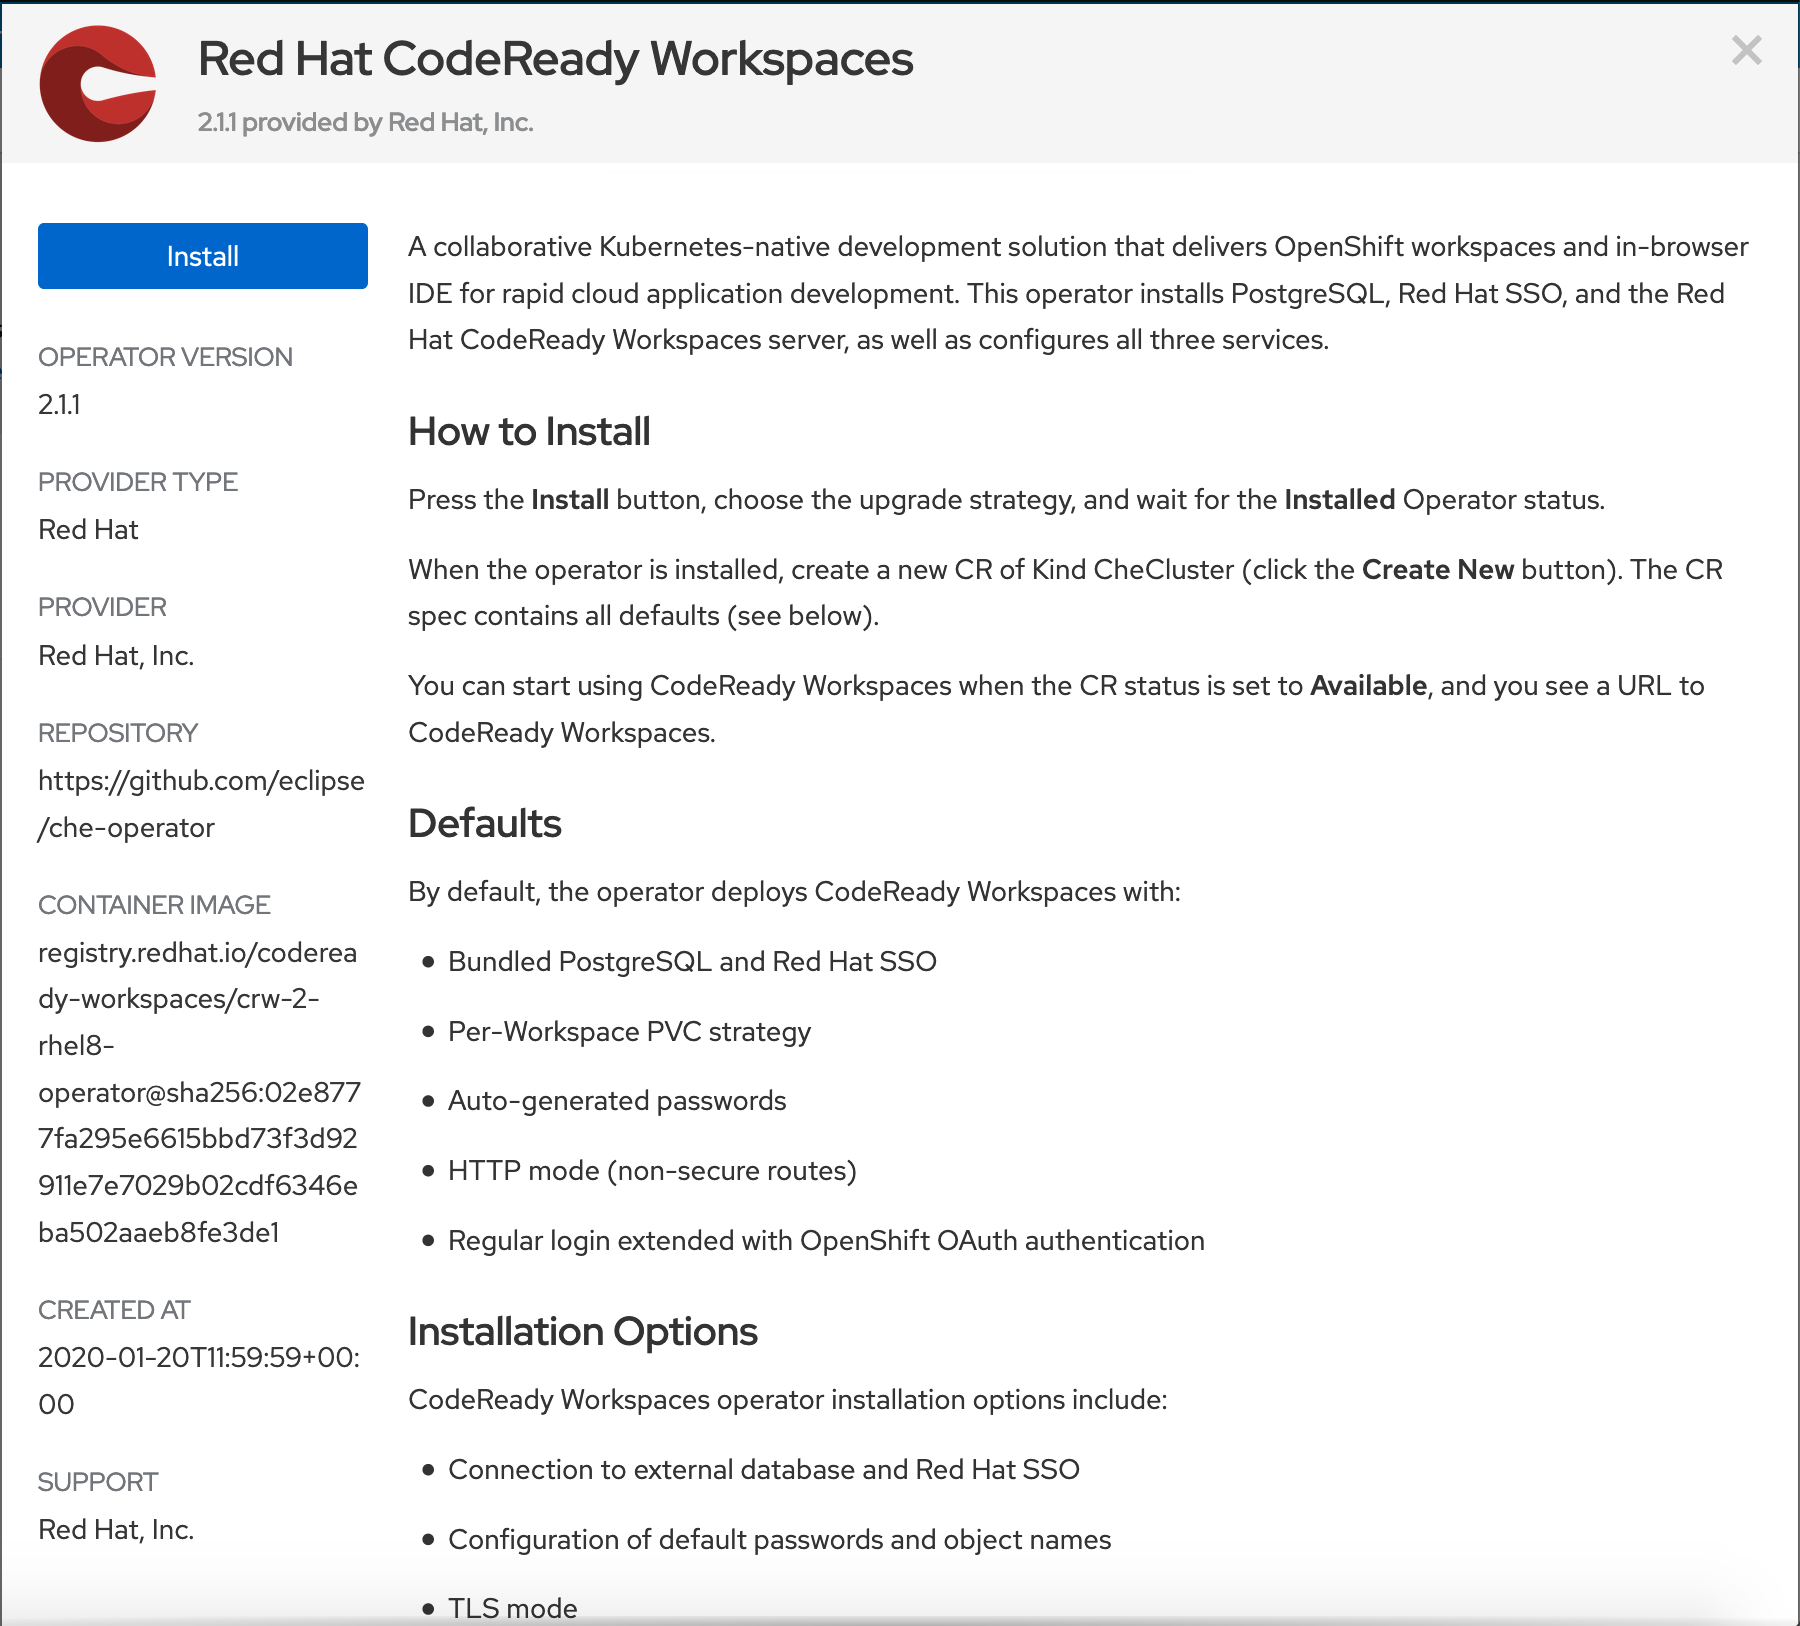 .
.
After you install the operator, continue to install CodeReady Workspaces:
1. From the OpenShift dashboard, go to Operators>Installed Operators.
2. Select CodeReady Workspaces.
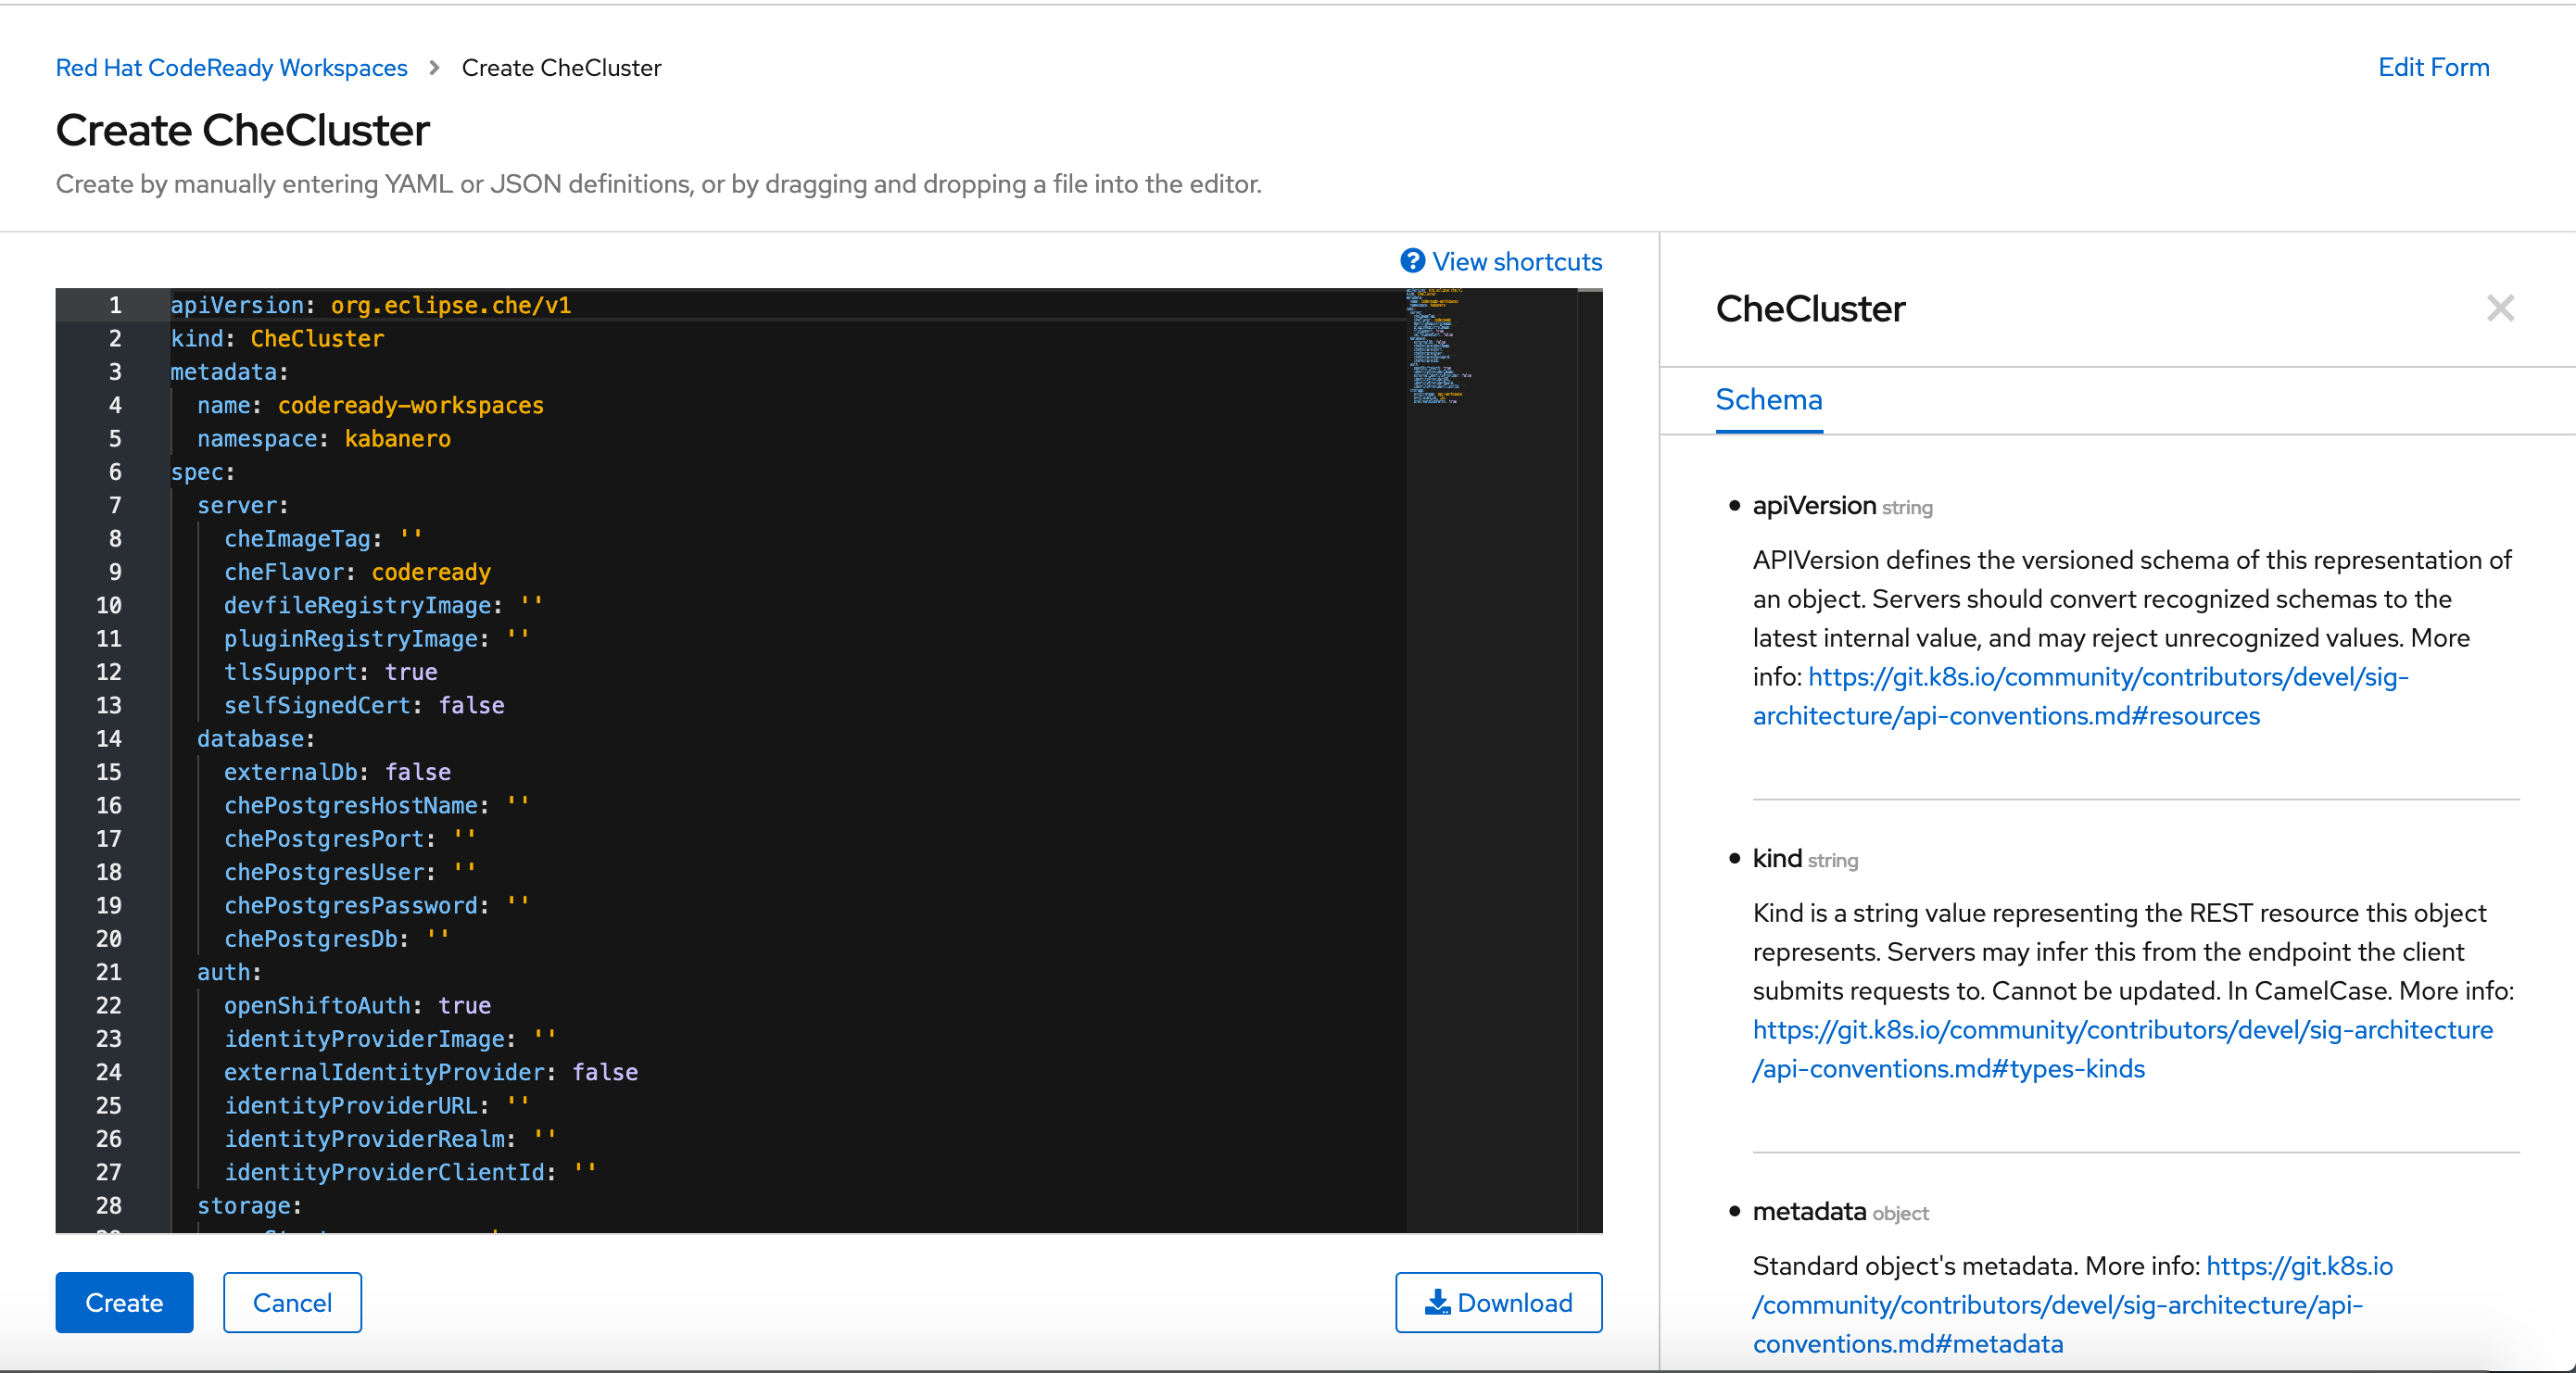
3. Select the CodeReady Workspaces cluster then Create CheCluster.
4. Configure the fields, like tlsSupport, as needed.
5. Copy and paste the following yaml into the provided text box:
apiVersion: org.eclipse.che/v1
kind: CheCluster
metadata:
  name: codeready-workspaces
spec:
  server:
    cheImageTag: ''
    cheFlavor: codeready
    devfileRegistryImage: ''
    pluginRegistryImage: ''
    tlsSupport: true
    selfSignedCert: true
    cheWorkspaceClusterRole: 'eclipse-codewind'
    customCheProperties:
      CHE_INFRA_KUBERNETES_WORKSPACE__START__TIMEOUT__MIN: "15"
      CHE_LIMITS_WORKSPACE_IDLE_TIMEOUT: "0"
      CHE_WORKSPACE_PLUGIN__BROKER_WAIT__TIMEOUT__MIN: "15"
  database:
    externalDb: false
    chePostgresHostName: ''
    chePostgresPort: ''
    chePostgresUser: ''
    chePostgresPassword: ''
    chePostgresDb: ''
  auth:
    openShiftoAuth: false
    identityProviderImage: ''
    externalIdentityProvider: false
    identityProviderURL: ''
    identityProviderRealm: ''
    identityProviderClientId: ''
  storage:
    pvcStrategy: per-workspace
    pvcClaimSize: 1Gi
    preCreateSubPaths: true
 .
.
- Note: If you install CodeReady Workspaces on an OpenShift cluster with publicly signed certificates, such as on IBM Cloud, set selfSignedCert to false.
6. After CodeReady Workspaces installs, click the CodeReady Workspaces URL.
7. A new window appears that prompts you to log in. If you have not made a CodeReady Workspaces account, do so by clicking Register:
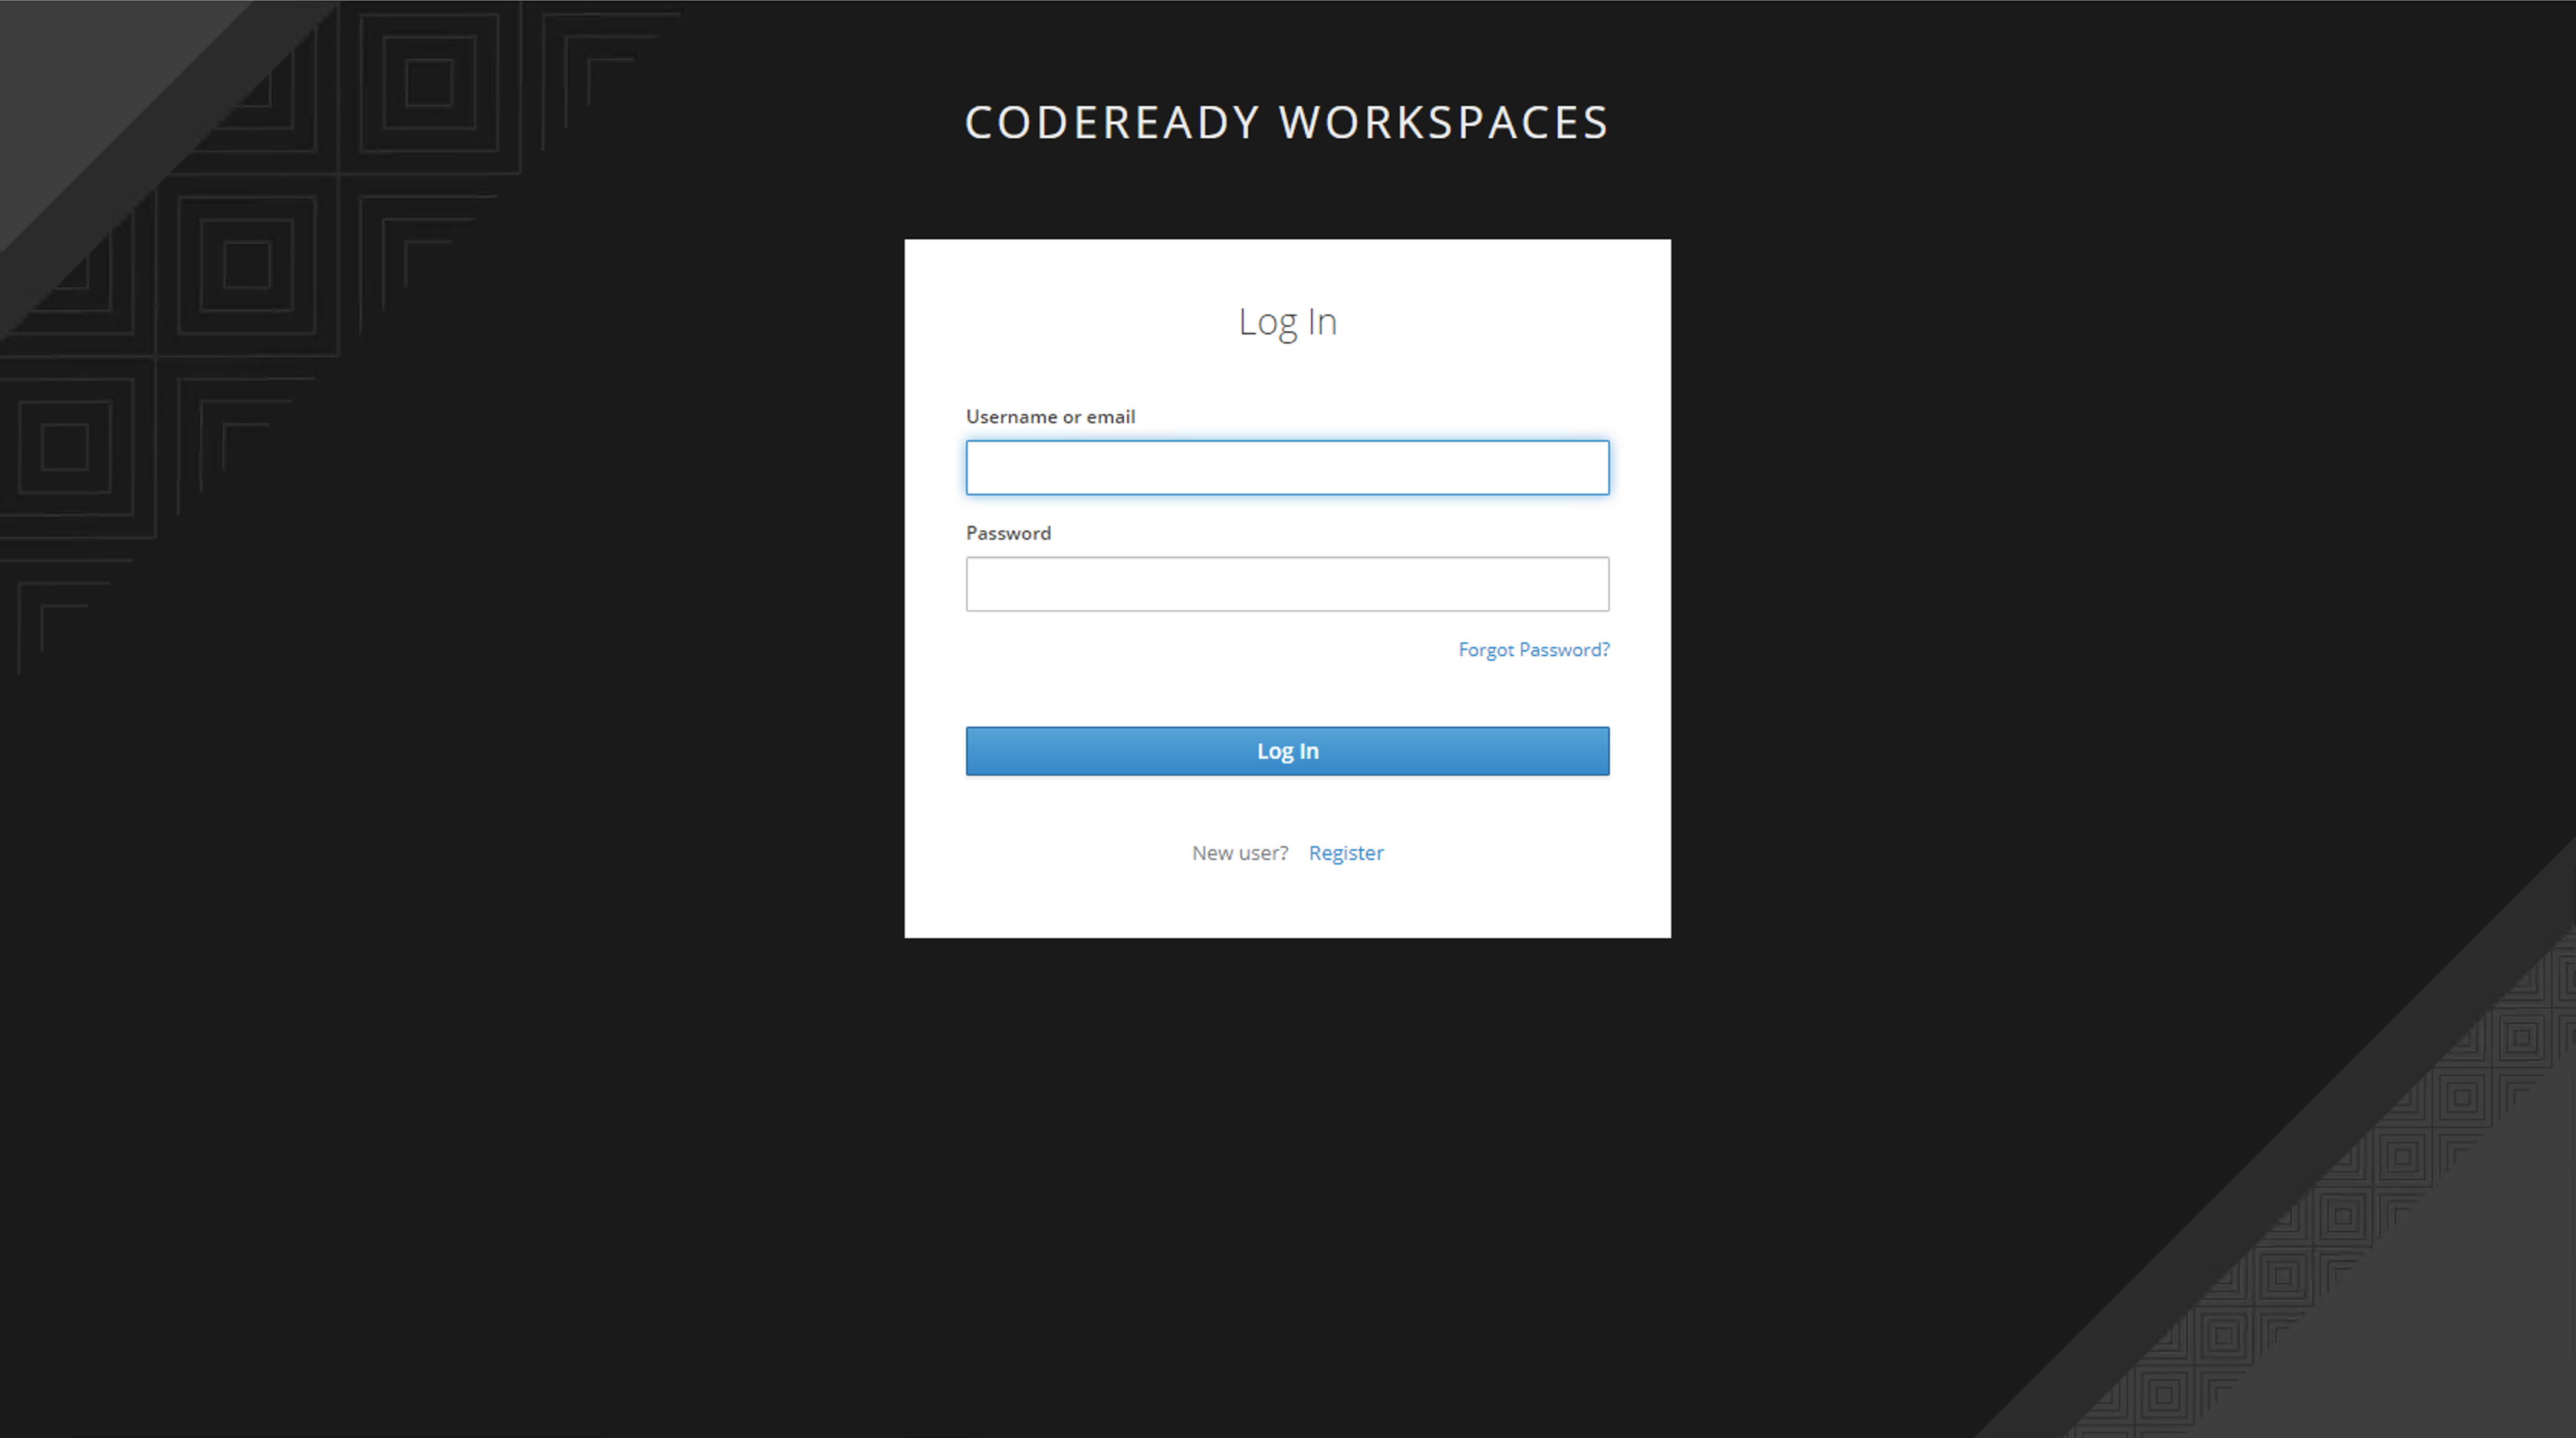 .
.
8. After you make a CodeReady Workspaces account, you can start to create a Codewind workspace.
Setting up Codewind
Because of its dependency on buildah, Codewind needs to run as root and privileged. To enable Codewind, run the following commands from your command line:
oc adm policy add-scc-to-user anyuid system:serviceaccounts:<namespace where you installed CodeReady Workspaces>:che-workspaceoc adm policy add-scc-to-user privileged system:serviceaccounts:<namespace where you installed CodeReady Workspaces>:che-workspace
CodeReady Workspaces starts Codewind and installs the Codewind plug-ins. This process might take a couple of minutes for all of the necessary components to be pulled and started.
Creating the Codewind workspace
After you set up Codewind, log in to your CodeReady Workspaces account and create a Codewind workspace from the Codewind devfile:
1. Log in to CodeReady Workspaces.
2. Go to Workspaces then click Add Workspace.
3. Click Import Devfile.
4. From Source, click YAML.
5. Go to the link, codewind-che-plugin/0.13.0/devfile.yaml, then copy and paste the contents into the YAML text box in your Codewind workspace.
6. Click Create & Open.
What you have learned
Now that you have completed this quick guide, you have learned to:
- Install CodeReady Workspaces and Codewind.
- Create a Codewind workspace within CodeReady Workspaces.
Next Steps
See other quick guides to learn how to develop with Codewind: