Creating and importing projects
Now that you have configured Codewind to be used remotely, you are ready to create a project that you can develop locally but build and run remotely.
Note: If you have projects that currently exist on your local computer that you would like to continue to develop remotely, follow Import an existing local project to the cloud.
Create a new project
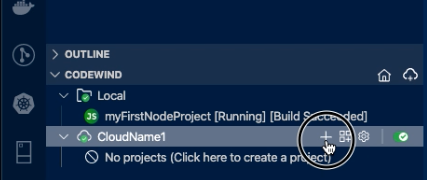
Go to the Codewind panel and click the Plus (+) icon on the new cloud deployment:
Select the template type and enter a project name. Your new project is built and after a few seconds begins running in the cloud.
Import an existing local project to the cloud
Copy an existing local project, for example myFirstNodeProject, over to the remote Codewind deployment:
1. Select the remote deployment and click the Add existing project button:
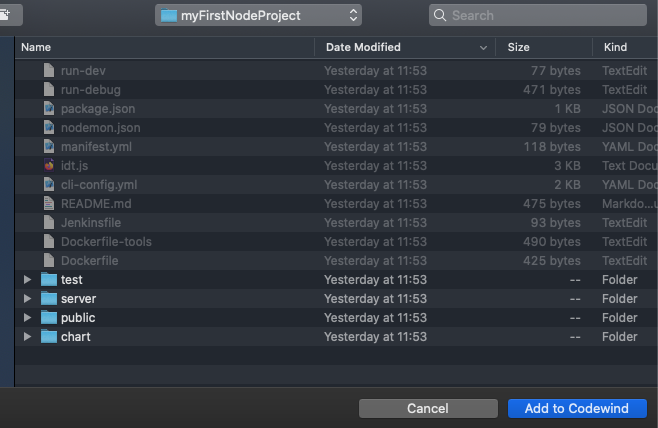
2. Go to the folder containing the local project files and click Add to Codewind:
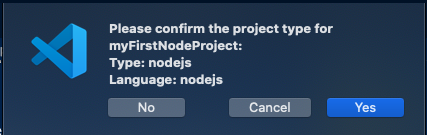
Codewind prompts you to confirm the project type, in this case, identified as Node.js:
3. Click Yes. Project files are copied over to the Codewind server, and the new myFirstNodeProject appears in the Codewind panel:
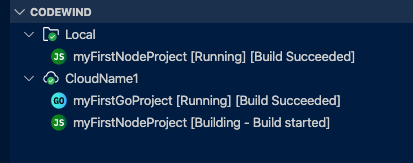
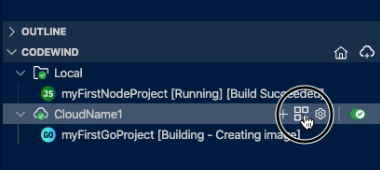
4. Codewind begins building the code and the Docker image. Moments later the project image is uploaded to Docker Hub and used by your cloud deployment to provision a new pod:
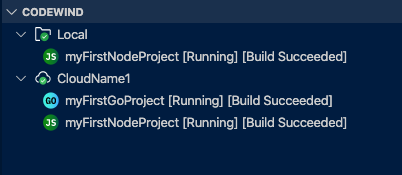
myFirstNodeProject on CloudName1 cluster is now running and ready.
Next Steps
You have now:
- Configured your local IDE’s Codewind extension to connect to Codewind in the cloud.
- Registered all necessary security parameters.
- Created a project that builds and runs in the cloud.
- Built and run an existing project in the cloud.
To understand more about how you can use project templates in Codewind, including using pre-supplied templates and creating your own, see Working with Templates